Article Objective: To assist users in navigating Active Ledger & Reporting to add and manage various depreciation years. Context: Asset data can be created for each entity in Active Ledger & Reporting in a few simple steps. Please refer to the Glossary for definitions of key terms used in this article. TABLE OF CONTENTS |
Adding depreciation years
Go to Assets on the left navigation panel to get started. If this is the first-time setup for an entity, select Add Depreciation Year to start creating a depreciation year.

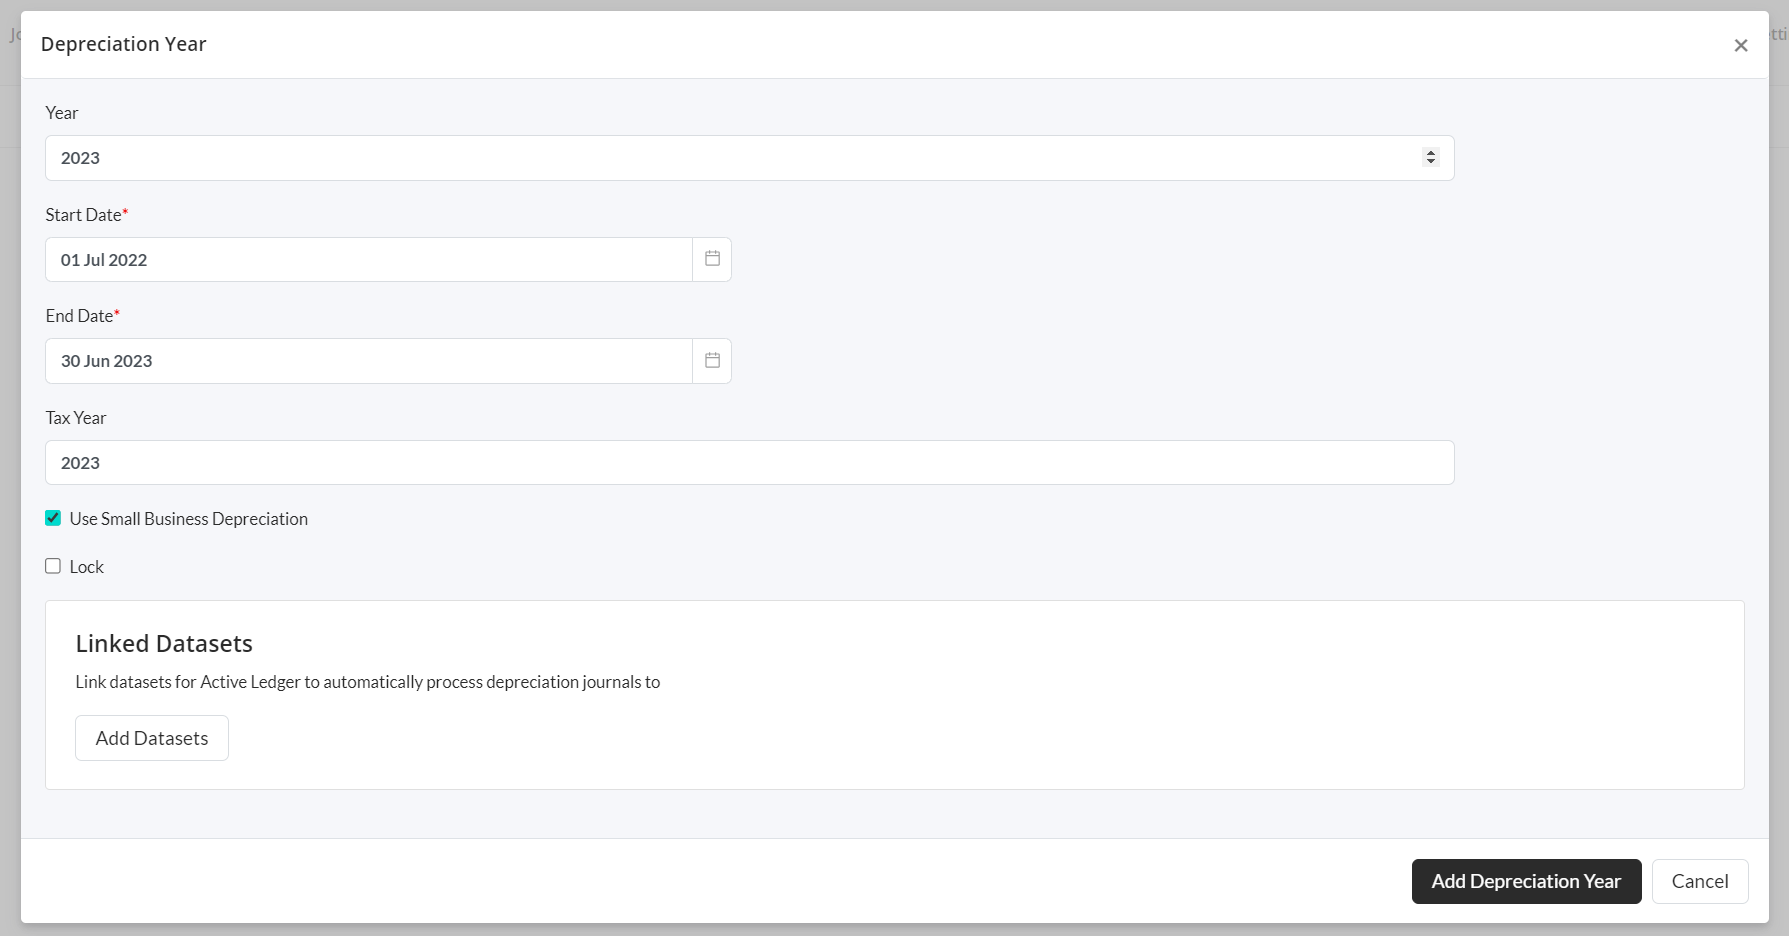
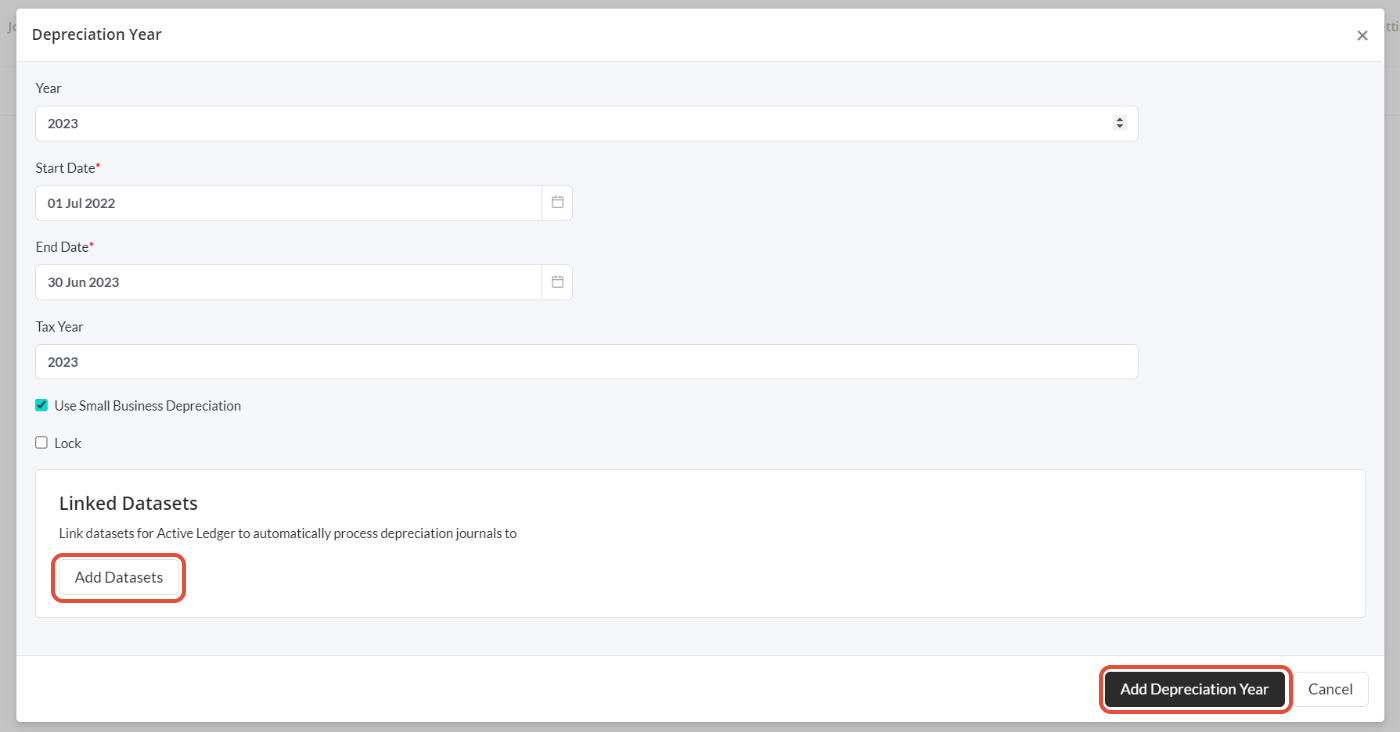
This will open a dialogue to select the depreciation year with the relevant start date and end date.

Note: Take care when creating the first depreciation year, as once set, you will only be able to create depreciation years after that year. In subsequent years, the depreciation year and start date will be automatically created and cannot be edited.
Small business depreciation (AU users ONLY)
There is the option to use small business depreciation rules for relevant years. The 'Use Small Business Depreciation' checkbox will need to be ticked to enable the creation of pools, as well as for allocating any assets to a pool. If this option has been selected, the 'Depreciation Method' when creating a new asset will automatically be set to 'Pool'. This can be changed simply by selecting another method in the dropdown menu. See the knowledge article: Assets - creating a register for more information on selecting depreciation methods.
Locking a depreciation year
Once finalised, you can lock a depreciation year by selecting the 'Lock' checkbox. Once a year is locked, the depreciation calculations for all assets in that year will no longer be recalculated and you can not add any new assets to that year. However, you can still delete an asset and the records for all years for that asset will be deleted. To unlock a year, simply uncheck the 'Lock' checkbox.
Linking a dataset
To allow Active Ledger to post automatic depreciation journals, click on the Add Datasets button and choose the relevant dataset/s for the entity.
Finally, click Add Depreciation Year.

Managing depreciation years

Once the relevant depreciation year/s have been created, you can view and edit these years by clicking on the Manage Years button.

This will take you to a list of the years available. From here you can see whether the depreciation year is linked to a dataset, whether it's using small business rules and whether it has been locked. This is also where you can create subsequent depreciation years by clicking on the + New Depreciation Year button.
To edit the year, simply click on it and you will be taken to a dialogue with all the same options as creating a new year.

Note: You can change the year you are viewing in any of the asset screens by selecting the relevant year in the Year dropdown menu at the top of the screen.

